🚀Day 14- Jenkins Fundamentals: A Comprehensive Guide

🎉 Hello There!!! I am Mohd Ishtikhar Khan, a skilled Cloud & DevOps engineer, having experience in automating various aspects of software development and deployment, including code integration, testing, and deployment processes and Planning and designing the cloud infrastructure in AWS.
⭐️ I thrive in bridging the gap between development and operations teams, with the goal of automating and streamlining the software development and deployment process. As Cloud and DevOps Engineers, we work to improve the speed, efficiency, and quality of software delivery, making it possible to release code faster and more reliably.
Experience in Designing and deploying dynamically scalable, available, fault-tolerant, and reliable applications on the Cloud. Maintenance and support of cloud infrastructure.Implementing cost-control strategies and Troubleshooting and resolving issues with the cloud infrastructure.
Experience in designing solutions that will help customers migrate, operate, deploy, optimize, and execute the DevOps vision of a project and also have a strong passion for technology exploration and development.
I believe that I am somebody with a very strong work ethic because I thrive in challenging environments and I also love building relationships and going out of the way to help a client.
🤝Let's connect! If you're looking to discuss DevOps fundamentals or if you want to share your experience, feel free to reach out to me at mohdishtikhar1786@gmail.com.
What is Jenkins?
Jenkins is an open-source automation tool written in Java commonly used for building, testing, and deploying software projects.
It is used to build & test your software projects continuously making it easier for developers to integrate their changes to the projects & making it easier for users to obtain a fresh build.
It facilitates the continuous integration and continuous delivery (CI/CD) of code by automating various stages of the software development lifecycle. Jenkins is highly extensible, with a large ecosystem of plugins that enhance its functionality.
The principle functionality of Jenkins is to keep track of changes in the version control system & to initiate & monitor the build system if any changes occur.
Jenkins monitors the whole process and provides reports and notifications to alert.
Advantages of Jenkins
Jenkins, as a widely used automation server, offers numerous advantages. Here are some key advantages of Jenkins:
Open Source and Extensible:
- Jenkins is an open-source tool, which means it is freely available for use and can be customized based on specific needs. Its extensibility is enhanced by a large and active community that continuously develops plugins to extend its functionality.
Continuous Integration (CI):
- Jenkins supports continuous integration, automating the building and testing of code whenever changes are committed to version control. This ensures early detection of issues and promotes a culture of integrating code frequently.
Continuous Delivery/Continuous Deployment (CD):
- Jenkins facilitates continuous delivery and deployment by automating the deployment process to various environments. This helps in reducing manual errors and ensures a streamlined and consistent deployment process.
Build Pipelines:
- Jenkins allows the creation of build pipelines, enabling the definition and visualization of the entire CI/CD process. Pipelines can be defined as code, providing a structured and version-controlled approach to build and deployment configurations.
Large Ecosystem of Plugins:
- Jenkins has a vast ecosystem of plugins that extend its capabilities. These plugins cover integration with version control systems, build tools, deployment platforms, monitoring tools, and more. This extensibility allows users to tailor Jenkins to their specific needs. For example Git, Maven 2 project, Amazon EC2, HTML publisher, etc.
Distributed Builds:
- Jenkins supports distributed builds, allowing tasks to be distributed across multiple machines for parallel execution. This feature improves build performance and scalability.
Integration with Version Control Systems:
- Jenkins seamlessly integrates with various version control systems such as Git, Subversion, Mercurial, and others. It can trigger builds automatically upon code changes, facilitating continuous integration.
Flexibility in Configuration:
- Jenkins provides flexibility in configuring build jobs. Users can choose between freestyle projects (GUI-based configuration) and declarative pipelines (defined as code in a Jenkinsfile), offering flexibility and ease of use.
Community Support:
- Jenkins has a vibrant and active community. Users can leverage community support through forums, documentation, and online resources. The community contributes to the development of plugins, providing a rich set of tools and integrations.
Ease of Use:
- Jenkins is known for its user-friendly interface, making it accessible to both beginners and experienced users. The GUI-based configuration and intuitive design contribute to its ease of use.
Versatility:
- Jenkins is versatile and can be used for a wide range of tasks beyond CI/CD, including automating repetitive tasks, running scheduled jobs, and managing infrastructure.
Security Features:
- Jenkins provides security features such as user authentication, role-based access control (RBAC), and the ability to integrate with external authentication systems. This ensures that access and permissions are managed securely.
Platform Independence:
- Jenkins is platform-independent, making it compatible with various operating systems. It can be installed on Windows, Linux, macOS, and other platforms, providing flexibility in deployment.
Overall, Jenkins' advantages lie in its versatility, extensibility, and ability to support a wide range of automation tasks throughout the software development lifecycle.
Jenkins Workflow
The workflow of Jenkins involves the automation of various tasks in the software development lifecycle, including code integration, building, testing, and deployment. Below is a general overview of the typical workflow in Jenkins:
Code Repository:
- Developers commit their code changes to a version control system (e.g., Git, Subversion). Jenkins monitors the code repository for changes.
Webhook or Polling:
- Jenkins can be configured to either poll the version control system at regular intervals or use webhooks to receive notifications about code changes.
Triggering a Build:
- When Jenkins detects a code change, it triggers a build process. This process involves compiling source code, resolving dependencies, and creating executable artifacts.
Build Environment:
- Jenkins can be configured to use specific build environments, which may include tools, libraries, and dependencies required for the build process. Docker containers or virtual machines may be used to ensure consistent build environments.
Build Script Execution:
- Jenkins executes build scripts or commands defined in the project configuration. These scripts compile the code, run tests, and generate artifacts.
Automated Testing:
- Automated tests, including unit tests, integration tests, and other relevant tests, are executed as part of the build process. The goal is to ensure that the code changes do not introduce new defects and that existing functionality remains intact.
Build Artifacts:
- After a successful build and testing process, Jenkins produces build artifacts. These artifacts may include executable binaries, libraries, documentation, or other deliverables.
Artifact Archiving:
- Jenkins archives the build artifacts, making them available for further stages of the deployment pipeline or for manual deployment if needed.
Deployment to Staging Environment:
- In a continuous deployment scenario, Jenkins may deploy the built artifacts to a staging or pre-production environment. This allows for additional testing and validation before deploying to production.
Automated Deployment:
- If the deployment to the staging environment is successful, Jenkins can proceed to deploy the artifacts to the production environment. This step is often automated to achieve continuous deployment.
Post-Deployment Steps:
- After deployment, Jenkins may trigger additional steps, such as running smoke tests, updating databases, or notifying stakeholders about the deployment status.
Monitoring and Logging:
- Throughout the workflow, Jenkins monitors the execution of tasks, logs relevant information, and generates reports. Monitoring tools and logging mechanisms help in identifying issues and performance metrics.
Notifications and Alerts:
- Jenkins can be configured to send notifications and alerts to relevant stakeholders, teams, or communication channels. Notifications may include build status, test results, and deployment outcomes.
Rollback (if necessary):
- In case of deployment issues or unexpected behavior, Jenkins can facilitate rollback procedures. Feature flags may be used to disable specific features or a previous version of the application can be redeployed.
Pipeline Visualization:
- Jenkins provides visualization tools to display the entire CI/CD pipeline. Pipeline views, build status, and test results can be visualized to provide insights into the health and progress of the software delivery process.
Jenkins facilitates the automation of these steps through the use of jobs, pipelines, and plugins. The flexibility and extensibility of Jenkins allow organizations to tailor their workflows to meet specific requirements and integrate with a variety of tools and services.
What is CI/CD?
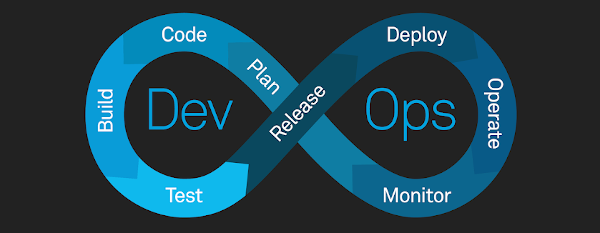

CI (Continuous Integration): CI or Continuous Integration is the practice of automating the integration of code changes from multiple developers into a single codebase. It is a software development practice where the developers commit their work frequently to the central code repository. Then there are automated tools that build the newly committed code and do a code review, etc as required upon integration. The key goals of Continuous Integration are to find and address bugs quicker, make the process of integrating code across a team of developers easier, improve software quality, and reduce the time it takes to release new feature updates.
CI (Continuous Deployment): Continuous Deployment (CD) is an extension of the Continuous Integration (CI) process that takes automation a step further by automatically deploying each code change that passes automated testing directly to production or a production-like environment. The goal of continuous deployment is to deliver new software features or improvements to end-users as quickly and efficiently as possible.
Now, let's explain the steps involved in CI/CD one by one:
1. Commit
Committing is saving your code changes in a shared repository, like Git. It helps collaboration, tracks code history, and starts the CI/CD process when new changes are saved. It helps team members collaborate, keeps a record of code changes over time, and starts the CI/CD process when new changes are saved.
2. Build
The building transforms our written code into executable artifacts. The CI/CD system gets the latest code, figures out what it needs, and creates a ready-to-use package. This step catches mistakes, ensures consistency, and sets the stage for testing and deployment.
3. Test
Testing is like double-checking our code to make sure it works well. We use automated tests to catch mistakes early, gain confidence in our code's reliability, and provide quick feedback to developers.
4. Stage
Staging is like getting our app ready for the real deal. We set it up in a special space that's a lot like where it'll actually run, called the staging environment. This helps us test everything just right, make sure the whole app works together well, and allow for checks before we put it out for everyone to use.
5. Deploy
Deployment is the process of releasing the application to users. It makes the app available, automates updates, and allows for quick rollbacks if needed, ensuring minimal downtime.
➡ In Conclusion, Implementing these steps in a CI/CD pipeline ensures a streamlined and automated software development lifecycle. This approach not only accelerates the delivery of software but also enhances the reliability, quality, and maintainability of the codebase.
Jenkins Installation
Prerequisites
Minimum hardware requirements:
256 MB of RAM
1 GB of drive space (although 10 GB is a recommended minimum if running Jenkins as a Docker container)
Recommended hardware configuration for a small team:
4 GB+ of RAM
50 GB+ of drive space
Software requirements:
- Java 11 or Java 17
Step 1: Installation of Java
Update the Debian apt repositories, install OpenJDK 17, and check the installation with the commands:
$ sudo apt update
$ sudo apt install fontconfig openjdk-17-jre
Step 2: Installation of Jenkins
$ sudo wget -O /usr/share/keyrings/jenkins-keyring.asc \
  https://pkg.jenkins.io/debian-stable/jenkins.io-2023.key
$ echo deb [signed-by=/usr/share/keyrings/jenkins-keyring.asc] \
  https://pkg.jenkins.io/debian-stable binary/ | sudo tee \
  /etc/apt/sources.list.d/jenkins.list > /dev/null
$ sudo apt-get update
$ sudo apt-get install jenkins
Step 3: Start Jenkins
You can start, enable, and check the status of the Jenkins service using the commands
$ sudo systemctl enable jenkins
$ sudo systemctl start jenkins
$ sudo systemctl status jenkins
Step 4: Access Jenkins
Jenkins uses port 8080, so browse instance public IP:8080 will open the Jenkins dashboard as given below

What Is a Build Job?
A Jenkins build job contains the configuration for automating a specific task or step in the application building process. These tasks include gathering dependencies, compiling, archiving, or transforming code, and testing and deploying code in different environments.
Jenkins supports several types of build jobs, such as freestyle projects, pipelines, multi-configuration projects, folders, multibranch pipelines, and organization folders.
What are Freestyle Projects?
A freestyle project in Jenkins is a type of project that allows you to build, test, and deploy software using a variety of different options and configurations. It allows users to create customized and flexible build processes using a graphical interface, offering versatility and control over the build steps and configurations.
Freestyle Project 1 :
Let's create a freestyle pipeline to print "Hello World!!
Creating a Freestyle Jenkins project involves setting up a project that allows you to perform various build and automation tasks without the need for writing code-based pipelines. Here's a step-by-step guide with an example explanation:
Step 1 :
Log in to your Jenkins dashboard.
Click on "New Item" in the top-left corner.
Enter a name for your project. Let's call it "demo-project1."
Select "Freestyle project" and click "OK."

Step 2:
In the configuration section, scroll down and select the "Build" section add an "Execute shell" build step, and add the following basic echo command to display the message.


Click on the "Save" button at the bottom of the page to create the project.
Step 3:
Once the project is created, click on "Build Now" to run the project.

Step 4:
Check the console output for the message.

Freestyle Project 2 :
Create a new Jenkins freestyle project for the Node App. This time we will pull the node application code from GitHub then we will build the docker image then from that image, we will deploy the node application.
Step 1 :
Log in to your Jenkins dashboard.
Click on "New Item" in the top-left corner.
Enter a name for your project. Let's call it "NodeApp-Demo"
Select "Freestyle project" and click "OK."

Step 2:
Now provide the GitHub repo details in respective fields.


Step 3:
Scroll down to the build steps, and add the commands as shown below

Click on the "Save" button at the bottom of the page to create the project.
Step 4:
Once the project is created, click on "Build Now" to run the project.

Step 5:
Check our code is successfully deployed and able to access through web page.

I hope this freestyle project sparks curiosity about CI/CD. Going Forward we'll delve deeper into its intricacies.
Multi Containers Freestyle Project To Run on Jenkins Agent
Create a jenkins project for two tier application to run multiple containers defined in docker compose file.
We will create docker-compose file in the repository and use docker-compose command to run the job.

Step 1 :
Log in to your Jenkins dashboard.
Click on "New Item" in the top-left corner.
Enter a name for your project. Let's call it "FlaskApp"
Select "Freestyle project" and click "OK."
Step 2:
Now provide the GitHub repo details in respective fields. We have added the label 'agent' of the Jenkins slave node in Restrict where the project can run options to run this project in jenkins agent node


Step 3:
Scroll down to the build steps, and add the commands as shown below

Click on the "Save" button at the bottom of the page to create the project.
Step 4:
Once the project is created, click on "Build Now" to run the project.
Step 5:
Check our code is successfully deployed and able to access through web page.

Jenkins CICD with GitHub Integration

Now it is time to set up a Complete Jenkins CI/CD Pipeline for our Node.js Application
The source code is on GitHub.
Whenever developers make changes in the repository, our pipeline start automatically (leveraging webhook functionality) for Continuous Integration.
The pipeline initiates the build process and deploys the code using our docker-compose.yaml file for Continuous Deployment or Delivery.
Step 1: We will generate the SSH keys for integrating our Jenkins project with your git repository. Use ssh-keygen command to create public and private key.

Step 2: Now Configure GitHub For Providing jenkins Node to pull code from github.
Go to your GitHub account settings.
Go to SSH and GPG keys, Add public key that we created using ssh-keygen, and select key-type Authentication key.
Step 3: Configure GitHub-Webhook for executing Jenkins automatically if any changes happen in the code.
Go to your GitHub repository and click on Settings.
Click on Webhooks and then click on Add Webhook.
In the ‘Payload URL’ field, paste your Jenkins environment URL. At the end of this URL add /github-webhook/. In the ‘Content type’ select: ‘application/json’ and leave the ‘Secret’ field empty.

Now check the webhook whether it is verified or not. If it is verified then you will see a green signature symbol as shown in the below image.

Step 4: Configure the Jenkins pipeline and set build execution steps with the docker-compose file.


Save the pipeline and build it

Step 5: Now check the your application is working or not. We can check using public ip:8000

Note: To test the webhook, let's make changes to our code in the GitHub repository and watch as our pipeline gets triggered automatically.
Thank you for reading. I hope you will find this article helpful. if you like it please share it with others
Mohd Ishtikhar Khan : )
